How to Make Delicious Beef & Gravy at Home
beef & gravy
There is a unique kind of magic that happens when a kitchen fills with the rich, savory aroma of simmering beef. For many of us, beef and gravy isn’t just a meal—it’s a time machine. It’s the sound of a bustling Sunday kitchen, the warmth of gathering around a crowded table, and the ultimate comfort after a long, exhausting week. In a world that moves too fast, mastering a classic, melt-in-your-mouth beef and gravy is how we slow things down and bring people together. If you’ve ever struggled with tough meat or lumpy, bland sauce, you are in the right place. Let’s look at exactly how to build deep, restaurant-quality flavor right in your own kitchen.
Table of Contents
1. Choosing the Right Cut for the Perfect Beef & Gravy
Why Meat Selection Determines Your Success
When you walk up to the butcher counter, the sheer variety of beef options can feel overwhelming. However, understanding the biology of the animal completely changes how you shop. You cannot simply grab any beautiful cut of beef and expect it to yield a tender, succulent result when simmered in gravy. In fact, lean, expensive cuts like filet mignon or sirloin will actually become dry, chalky, and incredibly tough if subjected to a long, slow braise.
To achieve that signature pull-apart texture where the meat effortlessly flakes away with a fork, you must intentionally seek out tougher cuts of meat that are packed with connective tissue, specifically a protein called collagen.
The secret lies in a beautiful kitchen transformation: during a low-temperature, extended cooking process, tough collagen fibers slowly break down and melt into gelatin. While collagen is rigid and stringy, gelatin is silky and moisture-retaining. This natural chemical shift does two critical things simultaneously. First, it bathes the individual muscle fibers in a lubricating protein matrix, keeping the meat incredibly juicy even after hours on the stove. Second, as that gelatin dissolves out of the meat and seeps directly into your cooking liquid, it acts as a natural body-builder for your sauce, providing a glossy finish and a rich, mouth-coating texture that store-bought stocks can never replicate.
The Ultimate Guide to Braising Cuts
To make your next trip to the grocery store entirely foolproof, let’s look closely at the specific cuts that yield the best results for this dish.
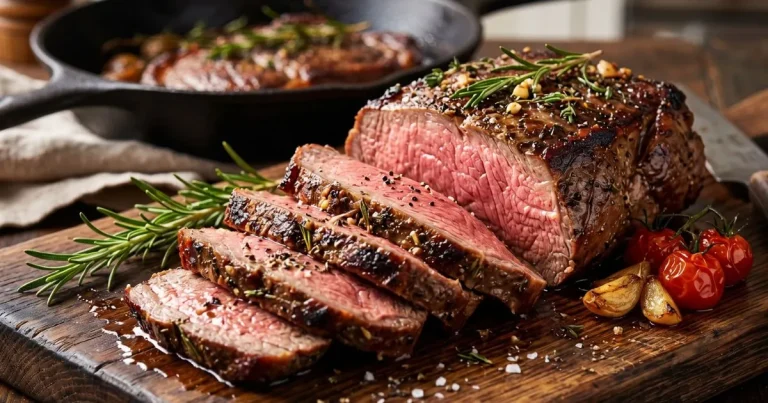
- Chuck Roast: Widely considered the undisputed king of beef and gravy, the chuck comes from the shoulder region of the steer. Because this muscle group works hard throughout the animal’s life, it is heavily laced with intramuscular fat—known as marbling—and thick bands of connective tissue. As it cooks, this interior fat melts completely away, continually basting the meat from the inside out while the collagen transforms into pure tenderness.
- Beef Round (Top Round, Bottom Round, or Eye of Round): Situated at the rear leg of the animal, the round is significantly leaner than the chuck and much more budget-friendly. Because it contains less internal marbling, it requires a much gentler, slower braising process to prevent it from drying out. When sliced thinly against the grain after a long simmer, it absorbs gravy beautifully.
- Beef Shanks: Cut from the leg, beef shanks are unique because they wrap around a center bone filled with marrow. The meat itself is incredibly rich in collagen, and as the bone marrow renders down into your gravy during the cooking process, it introduces an unparalleled depth of savory flavor and a velvety texture.
- Oxtail: While more bone than meat, oxtails contain the highest concentration of gelatin of any cut on the animal. Adding even one or two pieces of oxtail alongside a cheaper cut of beef round will completely elevate the richness and quality of your homemade gravy.
2. Master Ingredients & Ratios
The Ultimate Beef & Gravy Blueprint
Creating a memorable gravy is an exercise in culinary balance. A great gravy is never an afterthought made by splashing water onto a pan; instead, it relies on a deliberate, balanced ratio of rendered fats, flour, and deeply flavorful liquids. If you use too much fat, your gravy will separate into a greasy layer on top of your plate. If you use too much flour, the sauce will taste pasty, raw, and unpleasantly heavy.
Standard culinary ratios dictate that for a perfectly balanced, medium-thick gravy, you need roughly 2 tablespoons of fat and 2 tablespoons of all-purpose flour for every 1 cup of liquid introduced to the pan.
To ensure you can organize your kitchen workspace efficiently before you turn on the heat, gather the precise components outlined in the comprehensive master blueprint below.
| Ingredient Category | Component | Exact Measurement | Purpose |
| The Star | Chuck Roast (or preferred cut) | 3 lbs (cut into 2-inch cubes) | Provides the rich, meaty base, foundational savory fats, and gelatin. |
| The Aromatics | Yellow Onion | 1 large (finely diced) | Melts into the sauce to provide a subtle, underlying sweetness. |
| The Aromatics | Fresh Garlic | 4 cloves (minced) | Adds a pungent, sharp top note that cuts through the heavy fat. |
| The Aromatics | Whole Carrots | 2 medium (peeled and sliced) | Introduces natural sugars and color to balance the savory tones. |
| The Thickener | All-Purpose Flour | 3 tablespoons | Combines with the rendered beef fat to form a smooth, binding roux. |
| The Liquid Gold | Low-Sodium Beef Bone Broth | 3 cups | The essential flavor vehicle; bone broth delivers extra body and depth. |
| Flavor Boosters | Worcestershire Sauce | 1 tablespoon | Delivers concentrated acidity, salt, and a powerful punch of umami. |
| Flavor Boosters | Fresh Thyme | 2 to 3 whole sprigs | Infuses a clean, earthy, herbaceous aroma throughout the long simmer. |
| Seasoning | Kosher Salt & Black Pepper | To taste (approx. 1 tbsp salt) | Awakens the hidden flavors of the beef and sharpens the aromatics. |
3. Step-by-Step: How to Make Beef & Gravy
Building Layers of Deep, Rich Flavor
Great cooking is rarely a matter of luck; rather, it is a deliberate sequence of building distinct layers of flavor, where each step enhances the next. If you simply throw raw beef and cold broth into a pot together and turn on the stove, your meat will taste boiled, your gravy will look pale gray, and the overall dish will lack complexity. To prevent this, you must harness a fundamental scientific principle known as the Maillard reaction.

This reaction occurs when amino acids and natural sugars in the meat are subjected to high, dry heat (above $300^\circ\text{F}$ or $150^\circ\text{C}$). It causes the surface of the beef to brown, creating hundreds of entirely new flavor compounds that taste deeply savory, nut-like, and complex. As you sear the meat, it will naturally leave behind a layer of tightly stuck, deeply caramelized proteins and sugars at the very bottom of your pot. In French culinary terms, this golden-brown layer is called the fond. The fond is not burnt debris—it is the literal foundation of an elite, restaurant-quality gravy. Every single step in the process below is designed to capture, unlock, and amplify that flavor.
The Kitchen Workflow
Follow this precise sequence to transform these raw ingredients into a masterpiece of home cooking.
[1. THE SEAR] ---> [2. SAUTÉ AROMATICS] ---> [3. MAKE THE ROUX] ---> [4. THE SLOW SIMMER]
  High heat,          Scrape the fond,            Cook out the          Low heat, cover,
  brown the beef      soften the veggies          raw flour taste       2-3 hours until tender
Step 1: The Total Surface Sear
Place a heavy-bottomed Dutch oven or a large cast-iron pot over medium-high heat and add one tablespoon of a high-smoke-point oil, such as avocado or canola oil. While the pot heats up, take a handful of paper towels and thoroughly pat the exterior of your cubed beef completely dry. If the surface of the meat is wet when it hits the hot oil, the moisture will instantly turn to steam, dropping the temperature of the pan and boiling the meat instead of searing it.
Once dry, season all sides of the beef generously with kosher salt and freshly cracked black pepper. Drop the meat into the sizzling pot, ensuring you leave ample space between each piece. If you crowd the pan, the escaping steam will trap moisture around the meat. Work patiently in separate batches if necessary. Let each side cook undisturbed for 2 to 3 minutes until a rich, dark-brown crust forms easily, then flip. Once beautifully seared on all sides, remove the beef from the pot and set it aside on a clean plate to capture any running juices.
Step 2: Sautéing and Deglazing the Aromatics
Turn the stove heat down to medium. You will notice a thick, dark-golden crust covering the bottom of your pot. Immediately drop your finely diced onions, sliced carrots, and minced garlic directly into the remaining hot beef fat.
As the onions cook, they will naturally release water. Use a sturdy wooden spoon or spatula to firmly scrape the bottom of the pot. The moisture from the softening onions will dissolve the stuck fond, lifting those caramelized flavors off the bottom of the pan and incorporating them straight into the vegetables. Continue to sauté for 5 to 6 minutes until the onions turn translucent and the carrots begin to soften around the edges.
Step 3: Creating the Binding Roux
Sprinkle your 3 tablespoons of all-purpose flour evenly over the sautéed vegetables and hot fat. Using your wooden spoon, stir the mixture continuously for a full 2 minutes. This step is absolutely crucial. You are coating the flour particles uniformly in fat, creating a classic paste known as a roux.
Cooking this mixture for 120 seconds allows the intense heat to gently toast the raw starches in the flour. If you skip this quick step and pour liquid into the pan immediately, your final gravy will have a distinctly chalky, raw-flour aftertaste that masks the rich flavor of the beef. The roux should look like a golden-brown, fragrant paste clinging to your vegetables.
Step 4: The Extended Low and Slow Simmer
With your stove still on medium heat, pick up a wire whisk in one hand and your 3 cups of low-sodium beef bone broth in the other. Pour the broth into the pot in a very slow, steady stream while whisking the liquid vigorously into the flour-coated vegetables. Introducing the liquid gradually prevents the starches from clumping together, ensuring a smooth gravy. Bring the liquid up to a gentle boil; you will notice it instantly begin to thicken and turn a deep, glossy brown as the starches activate.
Turn the heat down to its lowest setting so the liquid is barely bubbling. Carefully slide the seared beef, along with every drop of meat juice that collected on the plate, back into the pot. Add your tablespoon of Worcestershire sauce and drop the fresh thyme sprigs directly into the liquid. Cover the pot tightly with its lid. Let it simmer undisturbed for 2.5 to 3 hours. Around the two-hour mark, check the meat with a fork; when it easily glides through the center of the beef with zero resistance, your dish is ready.
4. Troubleshooting: How to Fix Common Gravy Mistakes
Achieving the Perfect Velvety Texture
Even the most experienced home cooks run into occasional texture issues when making gravy. Because natural factors—like the exact moisture content of your vegetables or the precise evaporation rate of your pot’s lid—can vary, you may find that your final sauce isn’t exactly where you want it to be when the timer goes off.
The most important rule of the kitchen is simple: never panic. Gravy is incredibly forgiving, and almost any texture or flavor mistake can be corrected in less than five minutes if you understand how to use basic culinary techniques.
                       ┌──► [Too Thin?] ──► Whisk in a cold cornstarch slurry.
                       │
[Gravy Status Check] ──┼──► [Lumpy?]    ──► Run through a fine strainer or use immersion blender.
                       │
                       └──► [Bland?]    ──► Add Worcestershire, soy sauce, or cold butter finish.
Bulletproof Fixes for Culinary Success
- What to Do If Your Gravy Is Too Thin: If your cooking time is up and your gravy looks more like a thin broth than a rich sauce, you can easily rescue it without adding raw flour. In a small bowl, mix exactly 1 tablespoon of cornstarch with 1 tablespoon of completely cold water, stirring until it forms a smooth white liquid known as a slurry. Turn your stove heat up until the gravy reaches a rolling boil, then slowly pour the cold slurry into the pot while stirring constantly. Let the mixture boil for a full 60 seconds. The intense heat will cause the cornstarch molecules to swell and trap water, instantly thickening the sauce to a beautiful, velvety consistency without changing the flavor.
- What to Do If Your Gravy Turns Out Lumpy: If a few dry pockets of flour managed to escape your whisking and created stubborn lumps in your sauce, do not give up on the batch. You can fix this instantly using one of two mechanical methods. First, you can carefully pour the hot gravy through a fine-mesh metal strainer into a large bowl, using the back of a ladle to push the smooth liquid through while trapping the flour pockets. Alternatively, leave everything in the pot and insert an immersion blender (stick blender) directly into the sauce. Give it a few quick, controlled pulses on high speed to completely pulverize the lumps, restoring a uniform texture in seconds.
- What to Do If Your Sauce Lacks Flavor and Depth: If you taste your final gravy and find it tastes slightly flat or uninspired, it simply means it needs a final adjustment of acidity, salt, or umami. To fix this instantly, stir in a tiny splash (about half a teaspoon) of dark soy sauce or additional Worcestershire sauce. The fermented depth of these ingredients will immediately sharpen the beef flavors. Finally, turn off the burner entirely and drop one tablespoon of refrigerator-cold, unsalted butter into the hot gravy, swirling it gently until it melts completely. This classic restaurant technique, called monter au beurre, gives your gravy a glossy shine and a luxurious texture.
5. Frequently Asked Questions (FAQs)
Expert Tips for the Ultimate Beef & Gravy
What is the best way to thicken beef & gravy?
The absolute best and most traditional way to thicken this dish is by creating a cooked flour-and-fat roux directly in the pan before adding your cooking liquids. This method cooks out the starchy taste and yields a classic, opaque gravy that holds up beautifully over hours of simmering. However, if you are looking for a quick, gluten-free alternative at the very end of the cooking process, using a cold cornstarch slurry is an excellent option that produces a glossy, clear finish.
Can I make this beef & gravy recipe in a slow cooker?
Yes, you can easily adapt this recipe for a slow cooker, but you must make one crucial modification. Because slow cookers operate using an enclosed, low-evaporation environment, liquids do not reduce or thicken as they simmer.
To adapt the recipe, always sear your beef and sauté your onions in a separate skillet first to capture that essential Maillard reaction flavor, then transfer everything into your slow cooker basin. Pour in the beef broth, cover, and set the machine to cook on Low for 7 to 8 hours or on High for 4 to 5 hours. Because the flour roux will not thicken effectively in a slow cooker, omit the flour step during the sauté and instead stir in a thick cornstarch slurry during the final 30 minutes of cooking on the High setting.
How do I store and reheat leftovers safely?
To preserve the flavor and texture of your leftovers, transfer the beef and gravy into a clean, shallow, airtight glass or plastic container within two hours of cooking. Store it safely in your refrigerator for up to 4 days.
When you look at your leftovers the next morning, you will notice the gravy has solidified into a firm, gelatinous jelly—this is a sign of a perfectly made, gelatin-rich stock! To reheat it properly, place your desired portion into a small saucepan over medium-low heat and add a single tablespoon of water or fresh beef broth. As the gravy heats up, the gelatin will instantly melt back into a smooth, pourable liquid. Stir frequently to prevent the bottom from scorching.
Conclusion: Bring the Comfort Home
Mastering a comforting, old-school pot of beef and gravy is a true culinary milestone that fills both your kitchen and your soul. By intentionally choosing a cut of meat that is rich in natural collagen, taking the time to build a deep crust during the initial searing process, and allowing the sauce to reduce over a gentle simmer, you easily transform humble, budget-friendly ingredients into a spectacular dinner centerpiece.
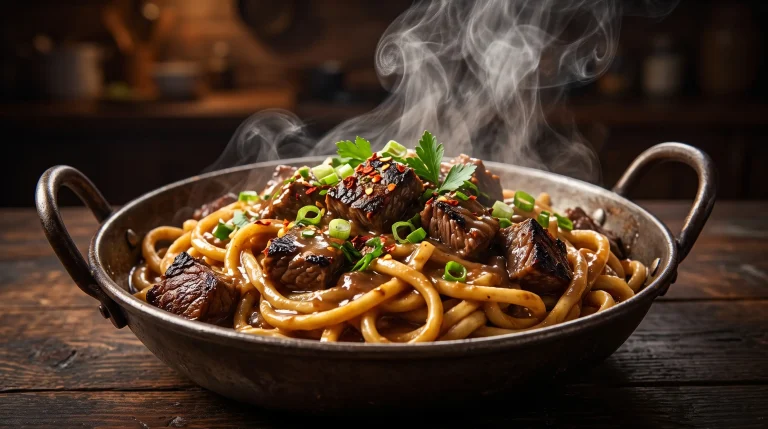
There are few joys in life that match the satisfaction of sliding a fork cleanly through a tender piece of beef that you nurtured yourself. Serve this rich masterpiece over a mountain of buttery garlic mashed potatoes, a bed of hot egg noodles, or simply alongside a warm loaf of crusty bread to wipe the plate clean. Gather your favorite people around the table, turn off the distractions of the outside world, and enjoy every single savory, comforting bite.
Share Your Kitchen Success!
Did your gravy turn out perfectly velvety, or did you try a unique twist with your choice of aromatics? We want to see how your comfort food creation came together! Leave a comment below sharing your cooking experience, or snap a photo of your comforting plate and tag us on social media using the hashtag #HomemadeBeefAndGravy. Let’s keep the tradition of great home cooking alive together!
Did You Try Our Recipe?
There are no reviews yet. Be the first one to write one.